Hey guys, Billy Jarrell here, back again with another DIYAutoTune QuickTip. I wanted to preface this article by saying there is definitely more than one way to skin a cat when it comes to wiring. I know someone may read this and think “That’s not how I do it, and I’ve never had a problem.” And, you may be correct, but as a professional auto tech for over 20 years, with the last 5 years specifically working in the automotive electrical diagnosis field, these are the methods, tips, and tricks I’ve found work the best for me and my customers. My hope is that the pros out there might pick up a tip they’ve long forgotten about, and the novices among you might put these wiring habits into practice to save huge headaches down the road. Either way, I think you’ll all find some useful information leading to long-term wiring success!
Calling all DIY enthusiasts! The thrill of the garage, the aroma of motor oil, and the satisfaction of turning wrenches—it’s what drives us. But amidst the world of DIY auto projects, there’s one critical aspect that can’t be overlooked: wiring. Specifically, we’re diving deep into the world of crafting a top-notch wiring harness for your DIYAutoTune.com standalone engine management system, like the mighty Megasquirt MS3X. Unleash your inner wiring wizard as we explore the unsung heroes of this game—non-insulated crimp connectors and heat shrink tubing. Let us arm you with the right tools and tricks for your wiring journey.
Art of the Mechanical Connection
Harness construction might sound technical, but let’s start with the basics. It’s all about making sure those wires stay together, and that’s where the magic of the mechanical connection comes in.
Choose the Right Crimping Tool
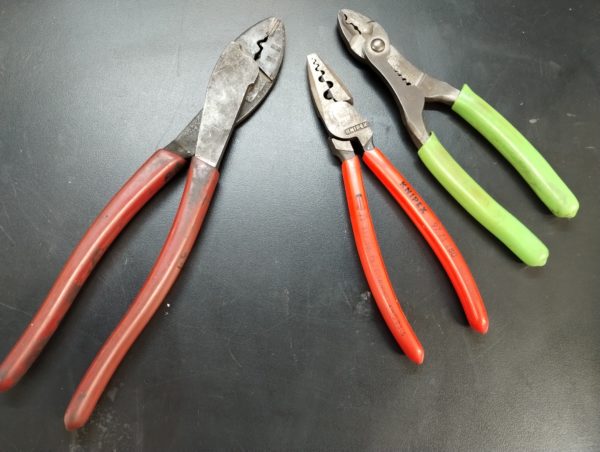
It all begins with the right tool. Invest in a high-quality crimping tool built specifically for automotive use. These tools are designed to give you the perfect crimp without mangling your wires. When selecting a crimping tool, look for one with multiple crimping sizes to accommodate a variety of connectors. A ratcheting mechanism can also be a game-changer, ensuring consistent and reliable crimps every time.
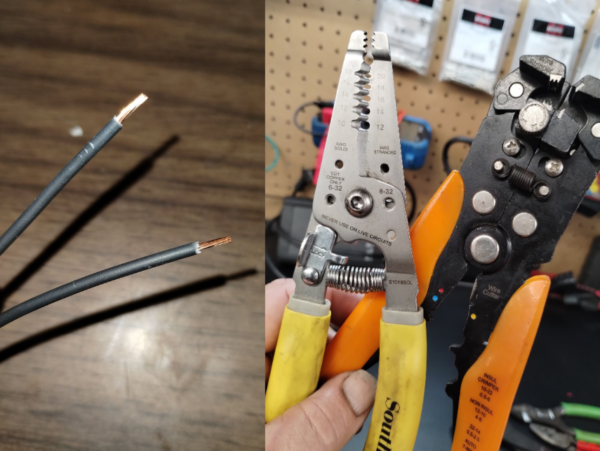
Mastering Wire Stripping
Wire stripping might seem like a straightforward task, but it’s a crucial step in achieving a solid mechanical connection. Use wire strippers to remove just the right amount of insulation, exposing the conductor for a pristine crimp. It’s essential to strip the wire to the appropriate length; too much stripped insulation can lead to problems down the road.
The Conductivity Conundrum
Now, let’s talk about keeping the electricity flowing smoothly. After all, we’re not here to create bottlenecks in your ride’s power delivery.
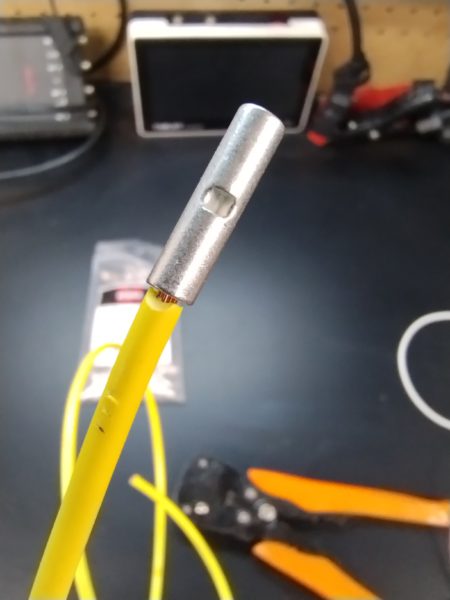
Embrace Non-Insulated Crimp Connectors
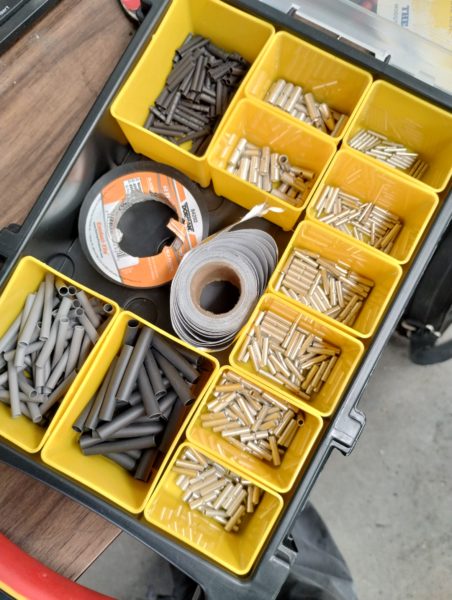
Say goodbye to inferior parts store insulated connectors and make way for their non-insulated cousins. These bad boys offer killer electrical conductivity. They’re often made from top-tier materials, which means minimal resistance and a smaller profile leads to a neater harness. Non-insulated crimp connectors come in various shapes and sizes, allowing you to choose the right one for your specific application. When selecting connectors, ensure they match the wire gauge you’re working with. A proper fit is essential for a secure and conductive connection.

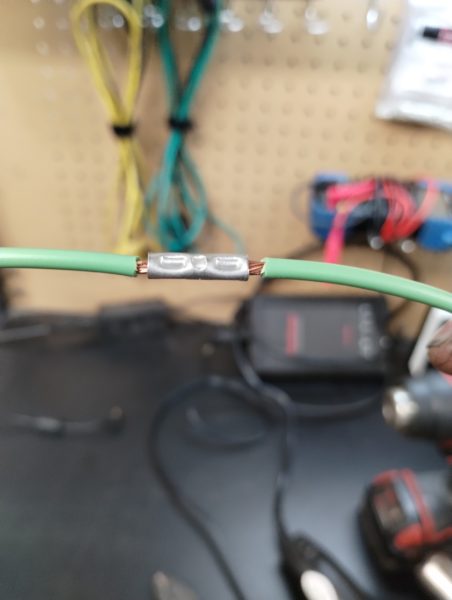
Give Your Crimps Some Love
After each crimp, take a closer look. Visual inspection is your buddy here. Make sure your connections are tight and free of any gaps or loose wires. The attention you pay now will save you from electrical headaches later. If you’re working on a complex wiring project, consider labeling your connectors or creating a detailed standalone wiring diagram to keep track of your connections. It’s a small step that can make a big difference in the long run.
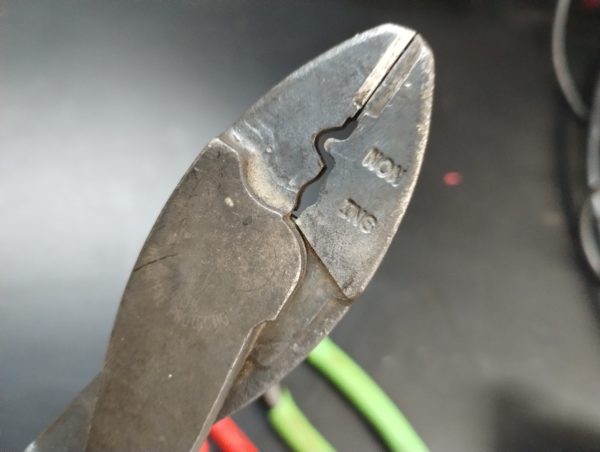
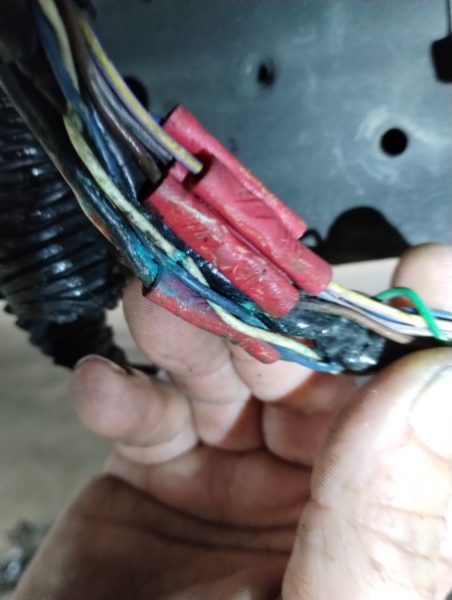
Crimping DONT’S
Weatherproof Your Standalone Wiring
Now, for the weatherproofing wizardry. Your ride faces all sorts of conditions, so it’s time to armor up.
Heat Shrink Tubing to the Rescue
Once you’ve crimped, it’s time for the heat shrink tubing to work its magic. This stuff does double duty—it insulates and shields against moisture and corrosion. Get yourself a heat gun to evenly shrink the tubing around your connection. Heat shrink tubing comes in various sizes and materials, so choose the one that suits your project best. It’s essential to select tubing with a shrink ratio compatible with your wire and connector sizes. This ensures a snug fit and a watertight seal once the tubing is heated and “recovered” or shrunk into place.
Choosing Your Tubing
Now, let’s explore the world of heat shrink tubing a bit further. Not all tubing is created equal, and it’s time to pick your poison.
Single-Wall Flexible Sheathing
Single-wall heat shrink tubing is your go-to for basic applications. Made from materials like polyolefin and PVC, it provides decent insulation and abrasion resistance. Perfect for projects where moisture and corrosion aren’t your main foes. Single-wall tubing is available in a range of colors, which can be handy for color-coding your wires and connectors, especially in complex wiring setups. Additionally, some varieties of single-wall tubing feature a 3:1 or 4:1 shrink ratio, making them versatile options for various wire and connector sizes.
Level Up with Adhesive-Lined Tubing
When you crave an extra layer of protection, adhesive-lined heat shrink tubing is your go-to. It takes the weatherproofing game to the next level. This tubing features an inner layer of heat-activated adhesive that forms a waterproof seal as it shrinks. Ideal for demanding DIY automotive applications, especially in the face of unforgiving conditions. Adhesive-lined tubing is often used in marine and off-road vehicle applications where moisture and corrosion resistance are paramount. This type of heat shrink can also provide some vibration protection as it tends to recover to a bit stiffer consistency adding a small amount of strain relief to your connection.
Mastering Heat Application
Choosing the right heat shrink tubing is only part of the equation. You’ve got to apply heat like a pro.
Specialized Tools for the Win
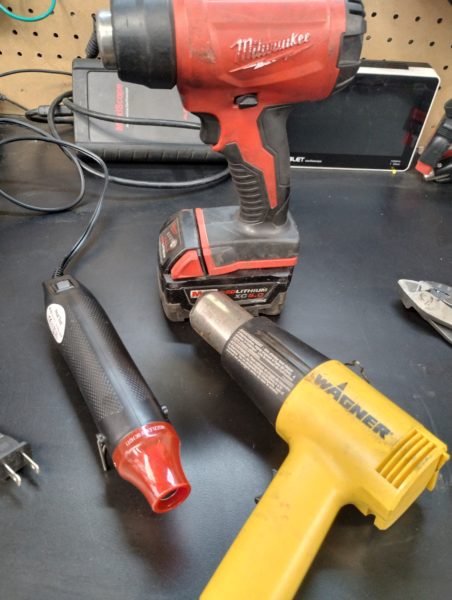
When it’s time for heat shrink action, reach for dedicated tools—heat guns or torches built for the job. These tools ensure controlled, even heat distribution, so your tubing and wires stay safe. Heat guns come with various temperature settings and airflow options, allowing you to tailor the heat to your specific needs. For more precise control, consider using a heat gun with adjustable temperature settings and a digital display. This allows you to dial in the perfect amount of heat for your heat-shrink tubing without risking overheating or damaging your wires.
Keep Your Distance
Don’t get too cozy with that heat source. Maintain a safe distance to avoid overheating or scorching. Always follow the manufacturer’s recommendations for temperature settings and exposure times. It’s crucial to move the heat source evenly across the tubing, ensuring uniform shrinkage. Avoid holding the heat source in one spot for too long, as this can cause the tubing to melt or deform. If you’re working in tight spaces or on delicate components, consider using a heat shrink tubing tool that provides precise control over the heating process.
Give It a Little Spin
As you apply heat, give your connection a gentle spin. This ensures the tubing shrinks evenly around the splice, leaving no room for air pockets or gaps. Rotating the connection is particularly important when using larger-diameter heat shrink tubing, as it helps distribute the heat evenly. It’s a small step that can make a big difference in the quality of your finished connection.
No Open Flames Allowed
Forget about open flames like lighters or candles. They can spell disaster with uneven heating and potential damage to your tubing or wires. Open flames also pose a fire hazard, especially when working in close quarters or around flammable materials. Stick to heat guns, heat shrink tubing tools, or other electrically powered heating devices designed for the job. These tools provide precise control over the heating process and are much safer options.
Inspect, Inspect, Inspect
After the tubing does its thing, give it a good once-over. Check to make sure it’s sealed perfectly around the connection, leaving no gaps, tears, or funky spots. This step is crucial for ensuring the long-term reliability of your wiring connections. Inspect both ends of the heat shrink tubing, as well as the entire length, to make sure it’s uniformly sealed. If you spot any irregularities or areas where the tubing didn’t shrink properly, simply apply heat to those sections until they seal correctly.
Additional Tips and Tricks
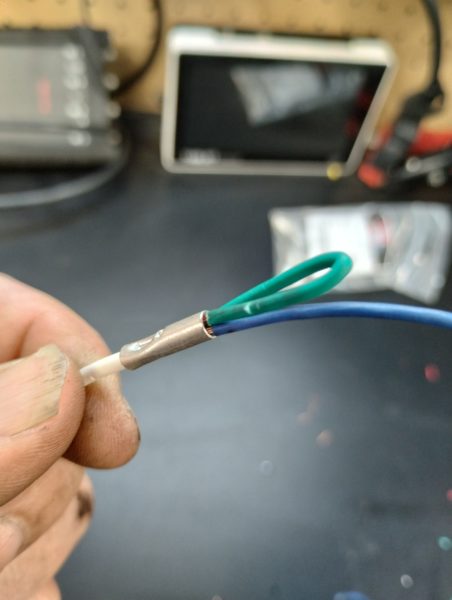
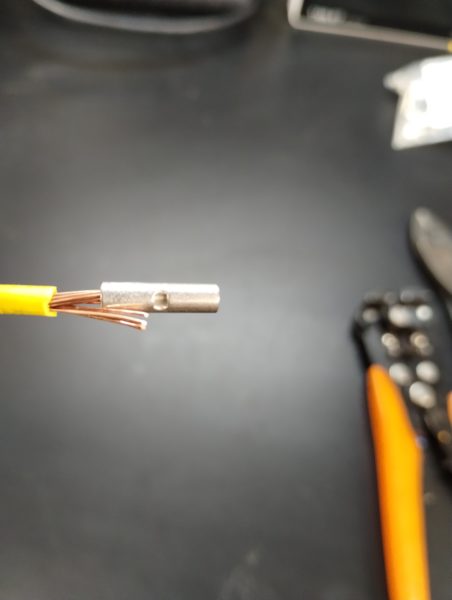
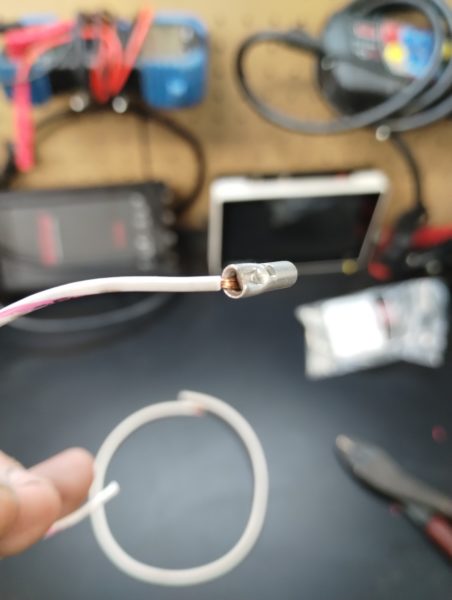
When you need to connect a smaller gauge wire to a larger one, use a loop of smaller wire as a filler to ensure there is enough copper in the crimp to ensure an excellent connection. This prevents the crimp connector from being oversized for the smaller gauge wire. Cover with dual-wall adhesive lined heat shrink to ensure moistureproofing.
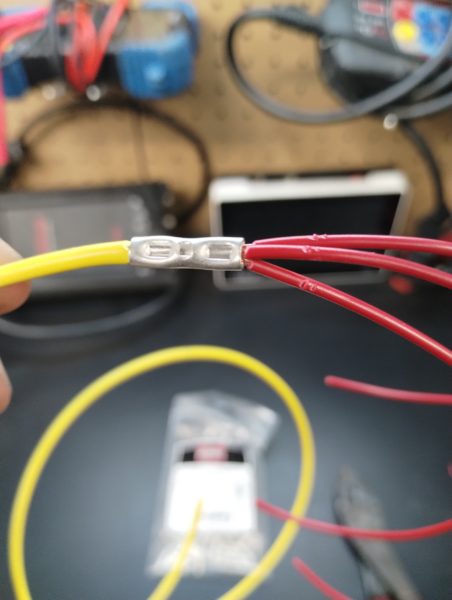
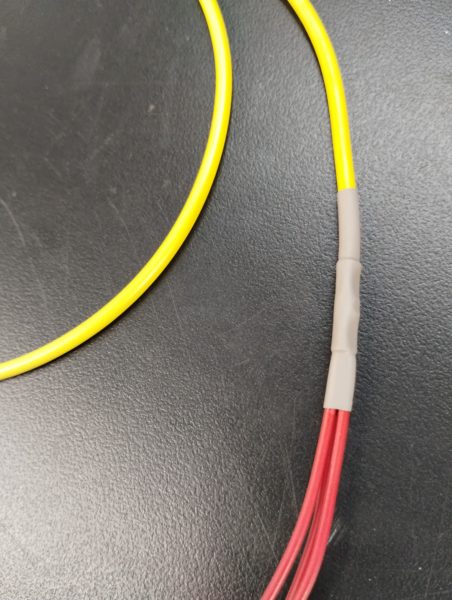
Sometimes we need to go from one larger wire to several smaller wires, like splitting powers or running multiple smaller grounds to one large one. In this case, use the larger gauge crimp connector and fill with the smaller wires. If you need to split one small wire into several of the same size, like for multiple 5v references, then use the “loop filler” method above, and then split them at the crimp connector into more wires. The use of adhesive-lined heat shrink here is a must as we need the adhesive to flow between the multiple wires leaving no gaps.
- Label Your Connections: If you’re working on a complex wiring project with numerous connections, consider labeling your connectors and wires. This makes it easier to identify and troubleshoot any issues that may arise in the future.
- Create a Standalone Wiring Diagram: For intricate projects, creating a wiring diagram can be a lifesaver. It provides a visual map of your connections, making it easier to follow and verify your wiring layout.
- Use Wire Loom or Conduit: To further protect your wiring harness, consider using wire loom or conduit to encase your wires. This provides an extra layer of insulation and safeguards against abrasion.
- Practice Proper Wire Routing: Pay attention to how you route your wires within your vehicle. Avoid sharp edges or areas with excessive heat, as these can damage your wires over time.
- Invest in Quality Connectors: While non-insulated crimp connectors are excellent for many applications, there are instances where specialty connectors, such as weatherproof connectors or Deutsch connectors, may be more appropriate. Invest in quality connectors tailored to your project’s needs.
- Keep a Variety of Heat Shrink Sizes: Stock up on a variety of heat shrink tubing sizes to accommodate different wire and connector diameters. Having a selection on hand ensures you’ll always have the right size for the job.
- Practice Patience: Wiring can be a meticulous process, and attention to detail is crucial. Take your time, double-check your work, and be patient. Rushing through wiring can lead to costly mistakes down the road.
Conclusion: Boost Your Standalone Wiring Game
In the realm of DIY auto projects, it’s the little things that make all the difference. When you’re crafting a Megasquirt flying lead wiring harness or tackling any standalone ECU system, nailing those crimp connectors and heat shrink techniques is your ticket to success. They ensure not only mechanical strength and electrical conductivity but also weatherproof your harness against the toughest automotive challenges.
By using non-insulated crimp connectors, quality crimping tools, and the right heat shrink tubing, you’re building a wiring harness that can handle whatever the road throws at it. Say no to subpar connectors from parts stores and steer clear of unreliable solder joints. Your DIYAutoTune.com standalone ECU installation deserves nothing but the best. Invest your time, effort, and DIY passion into your wiring game, and your MegaSquirt engine management system will be the powerhouse you’ve always dreamed of.
Remember, your wiring installation is a reflection of your skills and dedication. With the right techniques and tools in your arsenal, you can take your DIY wiring game to the next level and enjoy a ride that’s not only powerful but also reliable and safe. So, gear up, get those crimp connectors and heat shrink tubing ready, and let your wiring prowess shine in your next automotive adventure!