| This is for informational purposes only and IS NOT a replacement for thoroughly reading the MS/Extra Manuals, studying up a bit on the principals of tuning a car, and common sense ;). It’s based on our experiences, study, training and plenty of practice and we hope you find it helpful. As always, take your time, make sure you understand what you are doing, and take responsibility for your own tune!
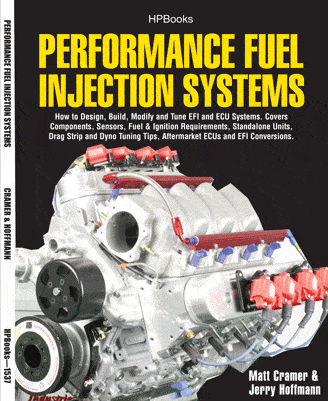
It’s important to note that ‘street tuning’ could imply driving an untuned vehicle on public roads while trying to tune it, which is a very bad idea and likely illegal so we do not advise tuning your car on public roads in an manner or form. Furthermore if you’re in a modern emissions controlled vehicle, chances are (depending on what country/state/province/etc you’re in) that it’s not legal to run a standalone EMS on the roads anyways. Hence this is not a street tuning article– this is a track/strip tuning article intended to help you to tune your engine while driving in a controlled, safe environment while observing all applicable laws! This article is written to try and address NA cars, turbo/SC cars, and stock NA cars that have been turbo’d supercharged. NA tuners can ignore the discussions of what to do in boost obviously. All AFR’s referenced assume you are running gasoline. Convert to lambda to use this as a rough guide for other fuels. If you have a good example ignition map for your motor when it was stock it would be helpful to start from there. Please note that typically I hate to recommend that you go ‘find someone else’s map and use it’. It will never be spot on for your engine, it could even be horribly wrong. But… you’ve tied my hands here, you don’t want to go to the dyno, you want to tune it yourself on the track. This is my best effort at helping you do that as safely as possible, even though I don’t prefer this method at all. What do I prefer you ask? Take your car to a qualified tuner on a load bearing dyno! What? You don’t want to do that… OK, proceed then. It is possible to do a fair job on the track, just more risky, and if you break something, all I can promise you is that all of the pieces are yours. 😉 Now, back to hopefully finding a relevant ignition table on the interwebs. You can often find this searching a web forum for enthusiasts of your particular car/engine. It doesn’t have to be a MegaSquirt spark map, just something you can translate over. If you don’t have a good base ignition map for your car then STEADY STATE dyno time with a qualified tuner is the ONLY way to properly generate one. I’m betting you can find a good base map for an NA engine though if you ask around. Note when doing this you are trusting someone else’s map, and that is risky. Look over it and make sure it looks sane. If you don’t know how to do that, ask someone that does to help. The stock map for the engine would be great if you can find it. Then keep in mind to only way to truly do this 100% right (get your spark map perfect for YOUR engine and configuration) is the qualified tuner on a steady state dyno. You can get close otherwise but I’d recommend staying as conservative as possible on timing so I’d recommend you go ahead and use the ‘table transform’ and ‘shift’ tool to pull 2-4 of degrees of timing from the entire table to start with to help add a degree of safety. If you are running forced induction on a previously NA vehicle the go ahead and pull 1 degree or so for each lb of boost in the boost range so that in boost you are pulling at a minimum 1 degree of timing for each lb of boost added. That’s a rough rule, some cars once dialed in need more pulled in certain areas and less in others. Some don’t need this much timing pulled per lb of boost ever, but if you’re working with the limitations of track tuning a car you don’t have the proper tools to do this right, so err to the safe side and be conservative. You haven’t driven the car at this point!!! Disable EGO correction by setting the authority to 0 and/or step size to 0. Next using a wideband o2 system tune the idle for best vacuum (lowest kpa) and/or for about 13.2-14.0:1 AFR. You want the highest amount of vacuum while being no richer than about 13.2:1 at idle. Then tune the ‘no-load’ area just a bit. It’s generally good to aim for 13.5-14.0:1 here. That would be tranny in neutral and slowly free revving the engine (not very high). You won’t be able to hold it in a particular cell very well so don’t spend alot of time on this, but you can make sure it’s not going too lean/rich and is ‘in the ballpark’. For forced induction (FI) guys– To be as safe as possible you can lock your wastegate open to prevent boost from being built (in theory, assuming wastegate and plumbing is properly sized and won’t boost creep anyways). You can do this by removing the spring, or disconnecting the flapper and tieing it open, or by using a regulated compressed air source to hold it open (keep the pressure just high enough to open the gate, too much pressure can damage the diaphragm). Now, assuming your car is getting tuned in pretty good in the areas you’ve worked on you can move on to the higher load areas. Partial throttle (start out low and work your way up in kpa) and letting it get up to higher RPMs. FI guys will likely be getting into boost here if you didn’t lock the wastegate open earlier. Either way you won’t be able to hold it in a given cell on the track but will have to let it sweep across the cells, trying to hold the load at a certain kpa as it sweeps across and repeating that as you attempt to dial in the AFR in these cells. Then move up to the next kpa row and repeat. If you see somewhere (say higher RPMs) that it gets lean then BACK OFF QUICK. Richen up that area of the map and then try again and err slightly to the rich side as you can always pull it back out later if you need to. As you approach 100kpa you’re either at max load (NA) or in what’s called the transition area on a turbo/sc car. NA at 100kpa we often tune right at 13:1. Dedicated road race cars or serious track day cars will want to keep it a bit richer at 100kpa, say 12.6:1-12.8:1. You won’t hurt power by doing this, and you’ll run a bit cooler. Above 100kpa you want to be richer. Low boost about 12.5:1 is usually fine, mid boost about 12:1 is good usually, and high boost closer to 11.8:1 and in some cases as rich as 11.5:1, though some go richer in the name of safety and to help cool the cylinders a bit, it’s arguable whether this is a good idea as there are better ways to cool the cylinders and running too rich causes other potential issues, but that’s another discussion. Be careful here and DO NOT let it get lean. Listen VERY carefully for any misfire or knock and diagnose it before moving on. Misfire can be identified in a datalog with wideband o2 by looking for a lean spot just after the RPM that it missed at (if you’re wideband is fast enough to capture and report that data). The lean spot is caused by the oxygen hitting the sensor just after a misfire event that caused that fuel/air not to burn. The o2 sensor sees the unburnt air and ‘thinks’ it’s lean and you’ll see that lean spike on the datalog. If you hear an event like this and there is no lean spot just after on the datalog then it’s very possibly knock or pre-ignition. Some describe knock is a rattling sound, like BBs in a can. It can be very audible, or can be very faint. I did mention this is risky right? There are several causes for this that would be better part of another discussion, but I’d try reducing timing around that point a bit and making darn sure you weren’t lean at all. If you still have knock/pre-ignition try colder plugs (you are running colder than stock plugs on your NA to turbo conversion right?). If you can shut down the engine immediately after hearing what you beleive to be knock, you can read the plugs and learn something there. I won’t get into plug reading here, google it! There’s plenty more that could be said about misfire and knock correction. Keep in mind that you won’t make a ton of power tuning AFR, that comes with tuning timing which is not possible to do with perfection on the track. You can get fairly close at WOT which for some is all they care about Perfect example may be a drag car where you can get fairly close and all you care about is WOT. I’d still argue there’s likely more to be gotten on a dyno given a bit of tuning time, as typically drag cars will get ‘all their timing in’ by a certain RPM and then that’s it, that’s what they run to redline. Sometimes you can run a bit more timing after the torque peak though and light it up a bit there, but you really need a dyno to find that torque peak and see the effects of adding that timing and make sure it was needed, and if not pull it back. There’s an acceptable range of AFR for a given engine in a given load/rpm range that you want to be in. You can do some fine tuning to get some modest gains but we’re not getting into all of that here. Once you’ve completed your track tune of your base fuel and spark maps you can re-enable AE and EGO correction which you disabled earlier. Use the MSExtra Manuals to determine the best values, though we typically start out with a TPSDot Threshhold of 0.5-0.8 and only increase it if it’s fluctuating enough to trigger AE when the throttle is being held steady when cruising, same goes for MapDot but 50-80 is the starting point. For EGO correction we usually use 1 percent steps and give it about 5-7% authority. You’ll need the crossover voltage set properly (or AFR target table, either way). Track/Strip Tuning Your MegaSquirt EMS SystemBe careful and take your time– and if you want further reading check this out! Performance Fuel Injection Systems by Matt Cramer & Jerry Hoffmann
‘Road Tuning’ is not meant to suggest tuning your car on public roads but instead on closed private roads or track situations only. For further information please see the Conditions of Use page. DIYAutoTune is a MegaSquirt EMS/EFI manufacturing and distribution company. Our main offerings include: MegaSquirt Plug-N-Play Engine Management System Kit, including several new vehicles, our MegaSquirt-I system, MegaSquirt-II, and MegaSquirt-III Assembled and unassembled versions, both with black cases.
|