This step occurs after ensuring that your base ignition settings are correct and the car starts, but before actually taking the car for a drive or presenting load to the motor. This is the first step in the actual tuning process, after finishing the installation process. For the article, we are using a MS2 ECU loaded with MS2/Extra 3.0.3 series firmware and TunerStudio tuning software, though the process is essentially the same with any MS3/Extra based ECU, including the MSPNP Gen2 lineup, as well as with all MS3/MS3Pro based products. This step also requires the use of a timing light.
Why is setting Base Timing Important?
Why do we do this? As you surely know, if you over or under advance the ignition events, you could cause damage to the engine. So the purpose of setting the base timing is to sync the ECU with the Engine. We are checking that our commanded ignition timing is the same as our actual ignition timing. To put that a different way– this step is required to make sure that the Ignition Timing that the ECU is trying to command, is ACTUALLY what the engine is running at when checked with a timing light. You have to syncronize the ECU with the engine, so that from there forward, when the ECU commands XX degrees of ignition advance, you know that’s what you’re getting. This ensures that your advance curve occurs as you’ve entered it into the ignition timing table. This is an extremely important step that should not be skipped.
Note: This How-To applies to most wheel decoders, but it does not apply to Toothed Wheel mode. This is because no offset should be necessary in Toothed Wheel mode. If your actual timing in Toothed Wheel is not the same as your commanded timing, there is a problem with your trigger wheel settings, most likely with your #1 tooth angle. Contact support if you need assistance with that!
Setting Base Timing: Step 1.
Following all manufacturer’s directions, carefully install a timing light on the cylinder #1 spark plug wire. Use all due caution here, as secondary ignition voltage can be as high as 100,000 volts or more. Also ensure that the timing light’s cords can not get tangled in a moving engine or burned on hot components.
Setting Base Timing: Step 2.
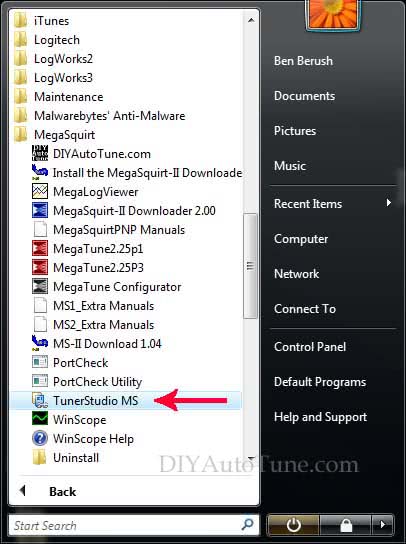
Make sure your tuning laptop is connected to your MegaSquirt and start your vehicle. If you have not already done so, go ahead and open up TunerStudio MS or TunerStudio Lite tuning software that you have already downloaded and installed on your laptop. Make sure that your laptop connects to the MegaSquirt and you are online.
Setting Base Timing: Step 3.
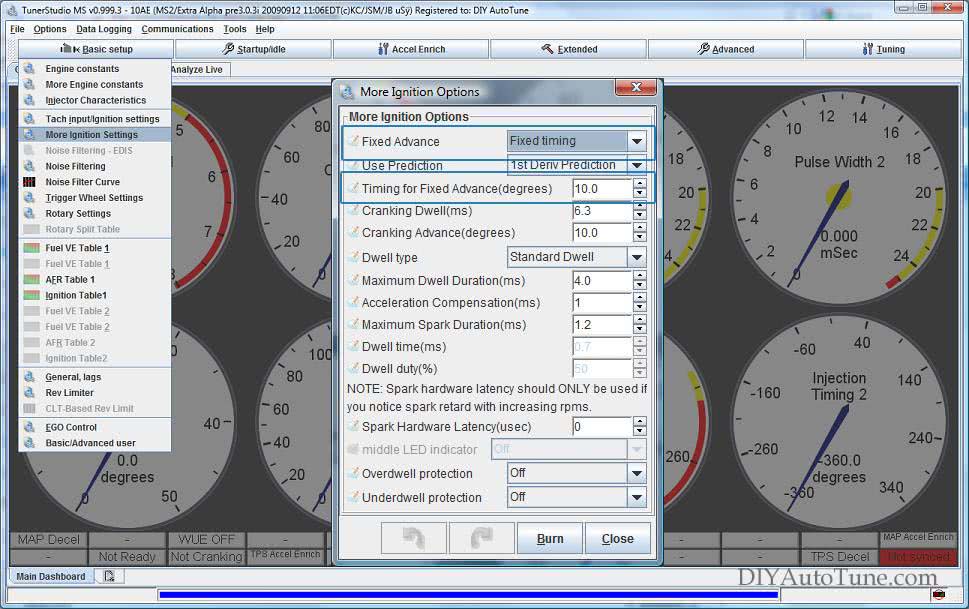
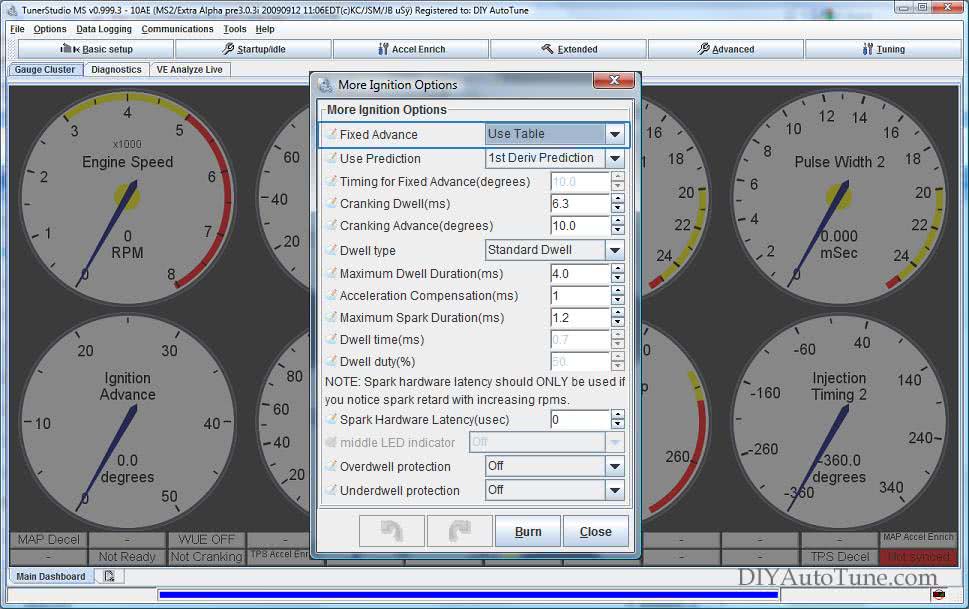
Navigate over to the Basic Setup tab and click on More Ignition Settings. This will open the More Ignition Options Menu. If Fixed Advance is set to Use Table, go ahead and set it to Fixed timing. This will tell the MegaSquirt to ignore our Ignition Timing Table and hold a fixed advance value. We will then need to enter a value in Timing for Fixed Advance (degrees). The value we enter here will be a static value that our MegaSquirt will use to command ignition timing. 10.0 is the default, and it will work for most vehicles. Other vehicles may require a bit more advance. For instance, for most rotary and Ford TFI engines, we prefer to set the Fixed Angle to 20.0 degrees. The key here is to enter a reasonable timing advance for your engine while we verify that our commanded timing is the same as our actual timing. Remember the value that you set here. For this example, I am setting the Fixed Angle at 10.0 degrees. Burn these changes and close this menu.
Setting Base Timing: Step 4.
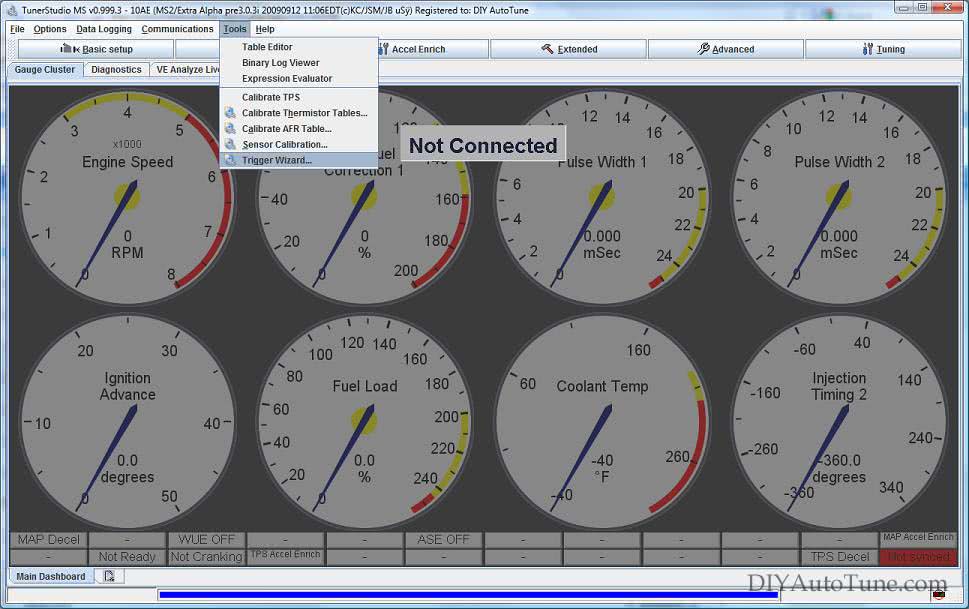
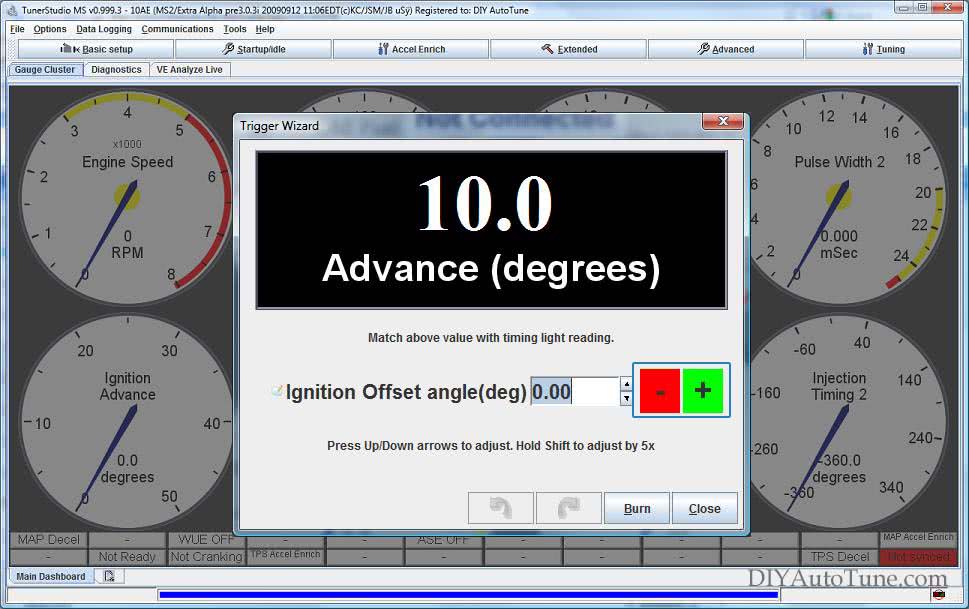
Now navigate over to the Tools Menu and open up the Trigger Wizard. The Trigger Wizard dialog box will open.
Setting Base Timing: Step 5.
Now it’s time to check your timing. The goal is to verify that the commanded ignition timing, the static value you entered earlier, is lined up with the actual timing. If you are unsure how to check timing for your vehicle, you may need to consult your factory shop manual or find a walk through on the internet.
Does your actual timing exactly line up with the commanded fixed angle you set earlier? If it does, you may skip to step 7. Most likely however it does not line up exactly, and if this is the case proceed to step 6.
Setting Base Timing: Step 6.
Follow this step if there is an error between actual and commanded ignition events. The Trigger Wizard should still be open on your tuning laptop. We will use the Wizard to remove this error. There are 2 buttons on the Trigger Wizard, a red – and a green +. These buttons will adjust our Ignition Offset angle. Use your mouse to click on the – or + button until your ignition timing is equal to the fixed advance set earlier. This step is easiest if you have a buddy checking ignition timing with the timing light while you operate the laptop (or vise-versa), however it can also be done solo by using a guess and check method. Remember to make small changes and check. Once our actual timing is equal to our commanded timing, Burn your Ignition Offset angle. Your base timing is set, and we’re almost done!
Setting Base Timing: Step 7
Lastly, we need to allow the MegaSquirt to command timing from the Ignition Table again so that it’s not stuck at the ‘fixed timing’ angle you commanded when testing and setting your base ignition timing. Close the Trigger Wizard and go back to the ‘More Ignition Settings’ menu under the ‘Basic Setup’ tab. Set your ‘Fixed Advance’ back to ‘Use Table’. Burn and close this menu. The MegaSquirt is now advancing our ignition timing based on your ignition timing table.
Keep Reading: Wanna learn more about how to tune EFI and Electronic Ignition? OF COURSE YOU DO!
 Check out the EFI Tuners Guide! How to Install, Configure, and Tune EFI!
Or jump right to the first chapter that talks Ignition Timing here!
