Updated 1/24/2012
I Bought a Used MegaSquirt, Now What?
This IS NOT a replacement for thoroughly reading the documentation, as much as something to help with where to start if a secondhand MegaSquirt has fallen into your hands. Perhaps you bought a car that already had one installed, or maybe you just found the ECU on its own for sale. Now, if you happen to have found a unit that is only built one way – an MSPNP or MicroSquirt, for example – and there are no custom modifications in it, you can just look up that unit’s documentation. If you have one of the “regular” MegaSquirts or a DIYPNP, though, these are designed to be easily customized by the end user, and you probably won’t be getting a “standard” product. Because of the DIY nature of MegaSquirt, buying a used MegaSquirt is kind of like buying a project car. Think of it as buying a project ECU. You’ve got a lot of similar questions either way.
First, what’s the quality of the workmanship? A project car with an engine swap with a hacked together wiring harness and parts made to fit with a sledgehammer may be more trouble than one with a well built wiring setup and carefully fitted parts. Likewise, homemade MegaSquirts aren’t all built to the same standard, so you will need to inspect the unit to see the quality of the soldering. And just like with project cars, sometimes the previous owner put it up for sale because he broke it.
Second, what mods are on it? A project car with cheap no-name eBay mods is quite different from one with top quality parts, and one that has weird parts you can’t find any documentation for can present unique challenges. Are they common mods from the MS/Extra manual, or weird one-off things? How well were they installed? You’ll need to go through the ECU and see exactly what it’s set up for. Many of them have been modified for specific ignition setups, or specific inputs and outputs a car needs – and if the MegaSquirt was previously installed on a different car from yours, some of the mods may need to be redone. You will want to verify proper setup and functionality before installing the used MegaSquirt to your vehicle.
Now How Do I Identify Which Version I Have?
Identifying what model MegaSquirt EMS you have will involve 2 parts–identifying the main board, and identifying the processor that is installed in the processor socket U1. If your MegaSquirt was originally assembled by DIYAutoTune.com, generally identifiying its model is as simple as turning it upside down and reading the label on the bottom of the case. The label will identify main board model, processor model, and the firmware that we originally installed on the MegaSquirt. It will not however identify any custom modifications that was installed either by DIYAutoTune.com or the original owner, and of course the original owner could have changed the installed firmware and/or processor pretty easily.
Finding a model identification label however probably shouldn’t preclude you from a visual inspection. If there was no label, then the visual inspection is mandentory. Currently, MegaSquirt EMS is available in 3 board versions and has 3 available processors. With one exception, you can easily install any of the processors on any of the boards. Here are examples to help you identify what MegaSquirt version main board and processor you have.
Main Board Identification
Here is how you can determine your main board version visually. The boards below have all had their main processor U1 removed (IE the MS1 processor, or MS2 or MS3 daughter cards are not installed in these pictures).
This is a PCB V2.2. One of the easiest ways to identify this board is that it is green in color. No other MegaSquirt mainboard uses a green PCB.

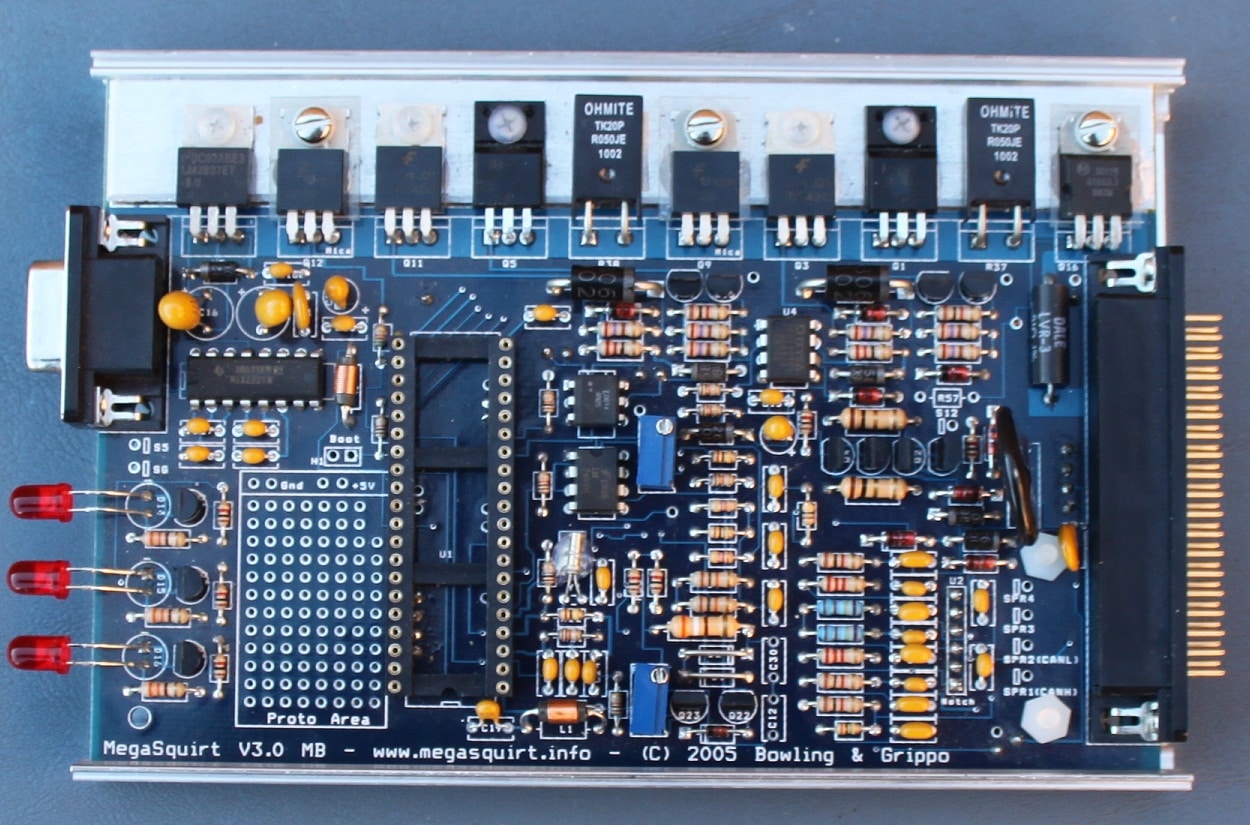
This is a PCB V3.0. Note that it has a lot more components than the V2.2, it is hand assembled, and it’s blue in color.
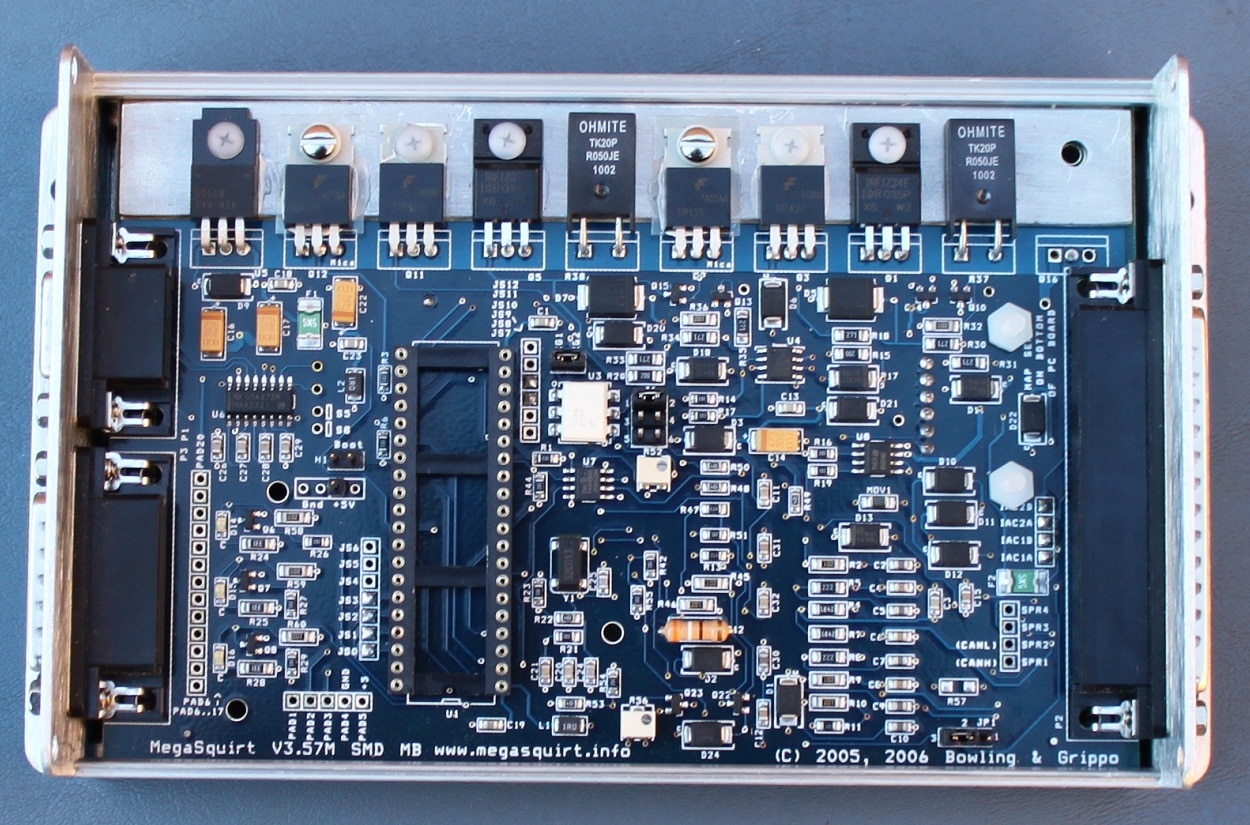
This is a PCB V3.57. It is easily distinguished from the PCB V3.0 by its surface mounted parts. This board is machine assembled. It also does not have the large “proto” area to the left of the main processor socket.
Processor Identifcation
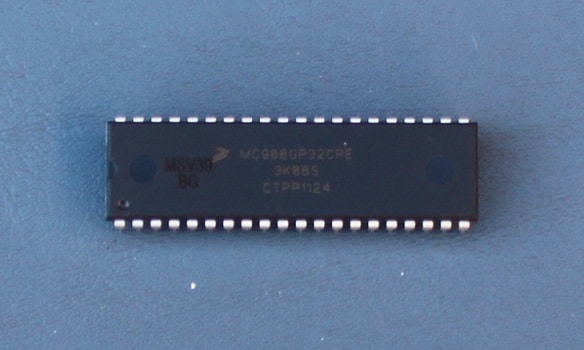
This is a MS1 processor. It is a single microchip. It can be installed on any of the main boards pictured above.
This is a MS2 daughtercard. It was designed as a plug-in upgrade for the MS1 processor. It installs in the same U1 processor socket instead of the MS1 processor. By removing the MS1 processor and installing the MS2 daughtercard, you can upgrade an MS1 EMS to MS2. Note that sometimes a few modifications will also need to be made to the main board to support the upgrade. The MS2 daughtercard is compatible with any of the main boards pictured above.
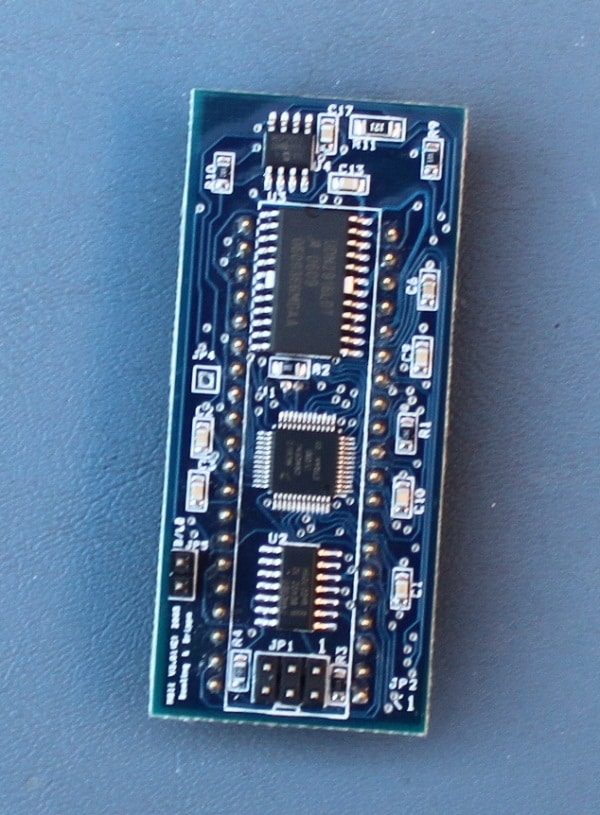
This is a MS3 daughtercard. It was designed as a plug-in upgrade for the MS1 or MS2 processor. It installs in the same U1 processor socket instead of the MS1 or MS2 processor, and provides a plug-in upgrade path. Note that sometimes a few modifications will also need to be made to the main board to support the upgrade. We recommend pairing the MS3 daughter card with PCB versions 3.0 or 3.57 only.

Be careful and take your time — and if you want further reading be sure to see these links:
www.msextra.com
DIYAutoTune.com FAQ
For further information please see the Conditions of Use page.